Registering for Courses through MyCCP
1. Log in to MyCCP. If you don’t know your username and password, click the “Student First Time User/Password Retrieval” link and follow the instructions.

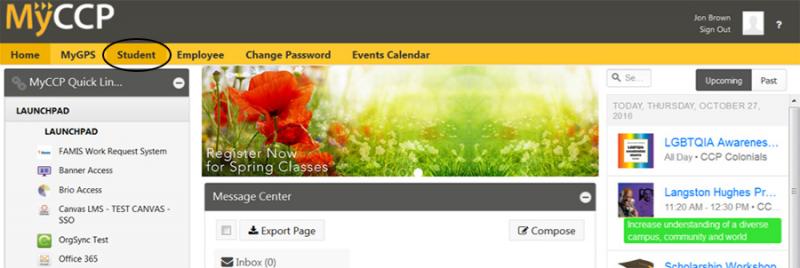
2. The first screen shown is your Home screen. To access the registration links, click on the Student tab.
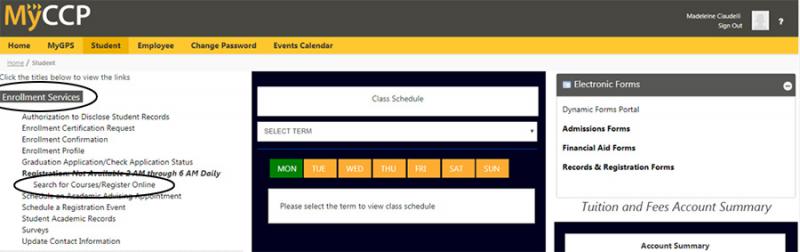
3. Click on “Enrollment Services,” then click on the “Search for Courses/Register Online” link.
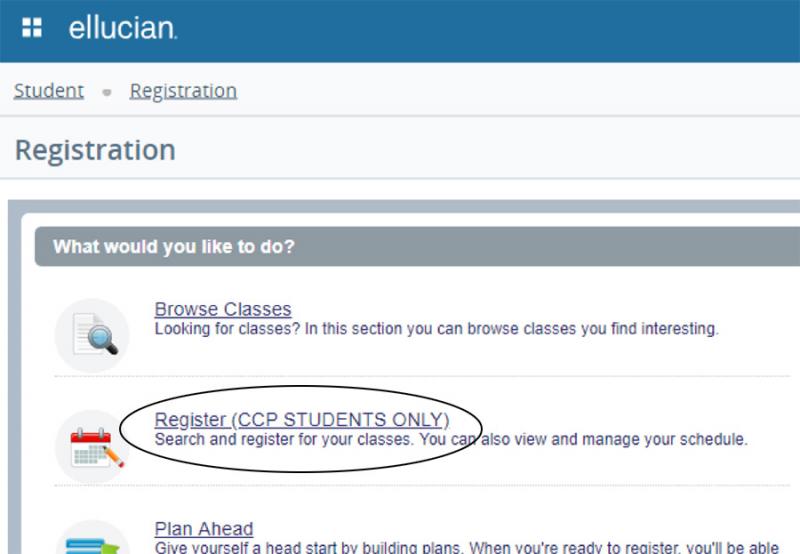
4. Click on “Register (CCP STUDENTS ONLY)”
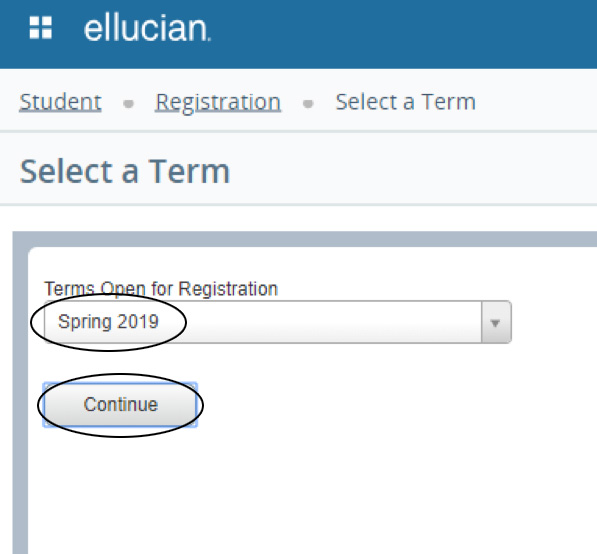
5. Select the term you want to register for from the drop-down menu, and then click Continue.
6. Click Advanced Search.
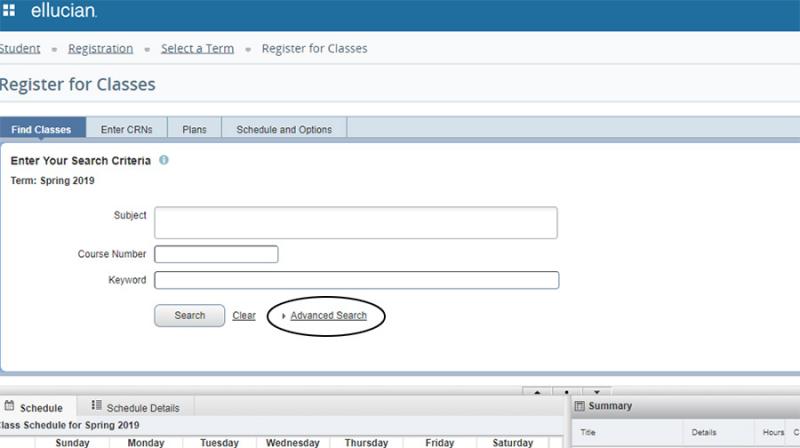
7. Use this screen to search for your classes.
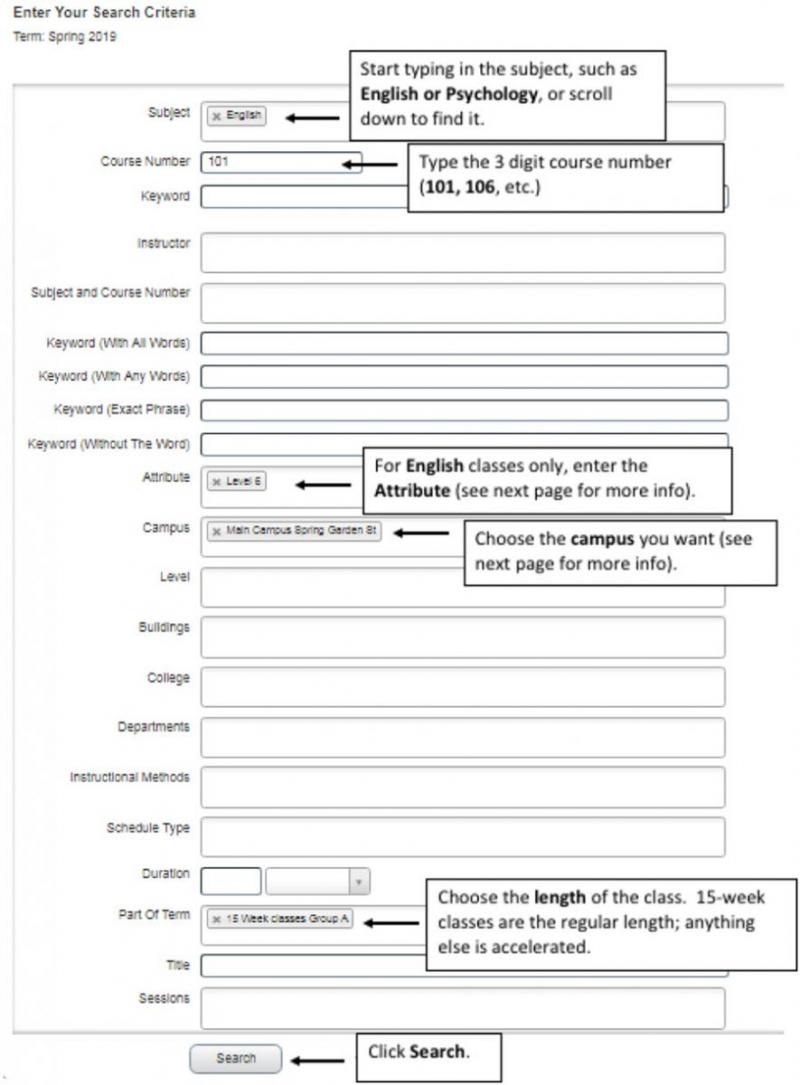
Pay special attention to the following:
- Attribute – For English classes. Ask an Academic Advisor if you are unsure which Attribute you need. All Attributes have linked English classes except Level 6.
- Accelerated Learning Program – ENGL 098 and 101
- Engl as a Second Lang –all ESL classes
- Level 2 –ENGL 098 and 099
- Level 3 –ENGL 098 and 108
- Level 5 –ENGL 101 and 108
- Level 6 –ENGL 101
- Campus – Make sure that you are not registering for classes offered at different campuses, unless that is what you want to do.
- Main Campus Spring Garden St - 17th and Spring Garden Streets
- Northeast Regional Center - 12901 Townsend Road
- Northwest Regional Center - Godfrey Ave. between Broad and 13th St.
- West Regional Center – 4725 Chestnut Street
- Distance Ed/Online Learning – completely online, does not meet in person
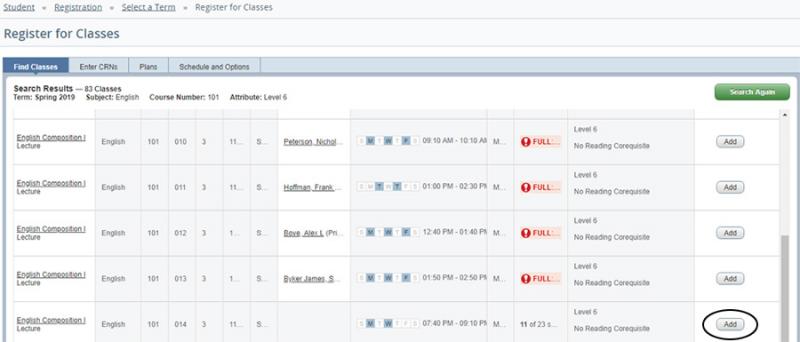
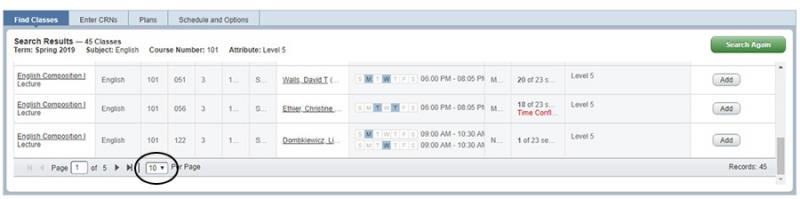
8. Scroll through your search results until you locate a section that you would like to register for. Click the “Add” button next to the class.
9. If you are only registering for one course (not a linked course) skip to Step 14. If you are registering for linked English courses, continue to Step 10.
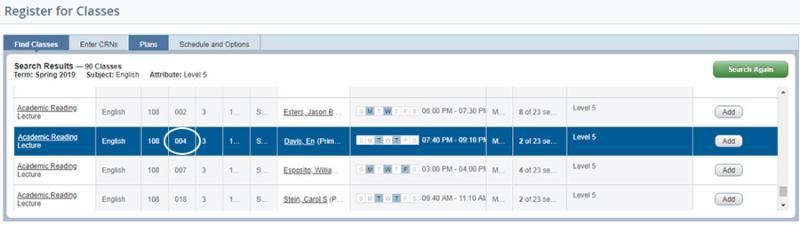
10. If you are registering for linked English courses, now you need to find the linked course. Find the Section number for the first course. Now you need to find the second course with the same section number.
11. Scroll to the bottom of the results and select 50 results per page.
12. Scroll down to find the second course you need with the same Section number as the first course. Click Add.
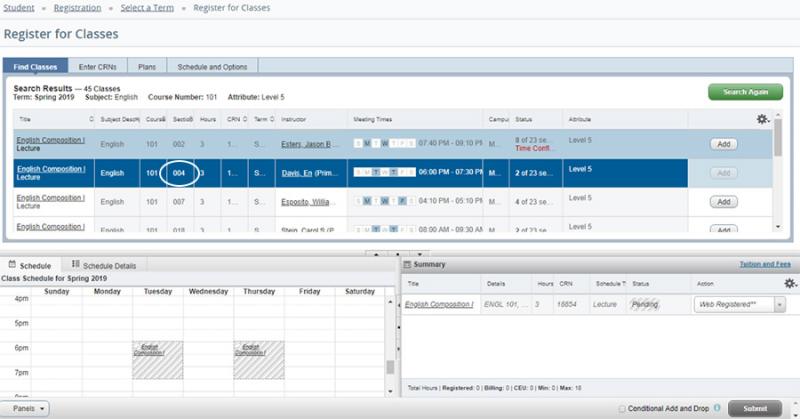
13. You should now see the two linked courses in the Summary section.
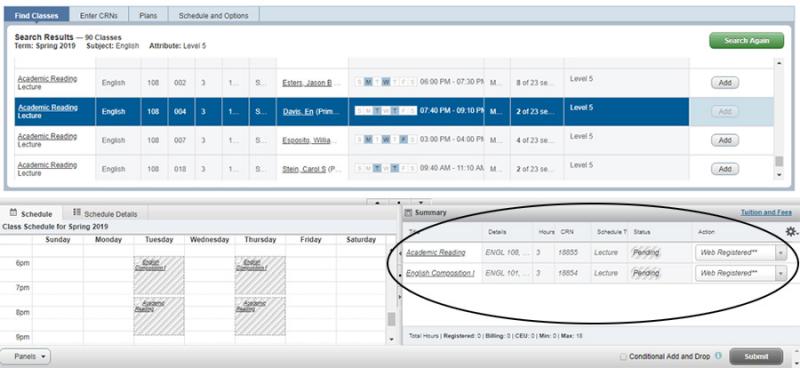
14. Click Submit.

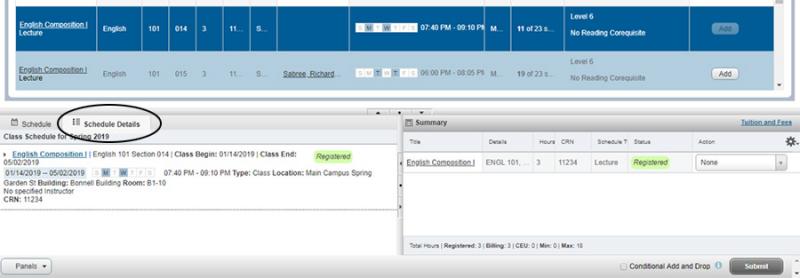
15. A successfully registered class will say Registered under Status and show up on the calendar on the left with a checkmark next to it.
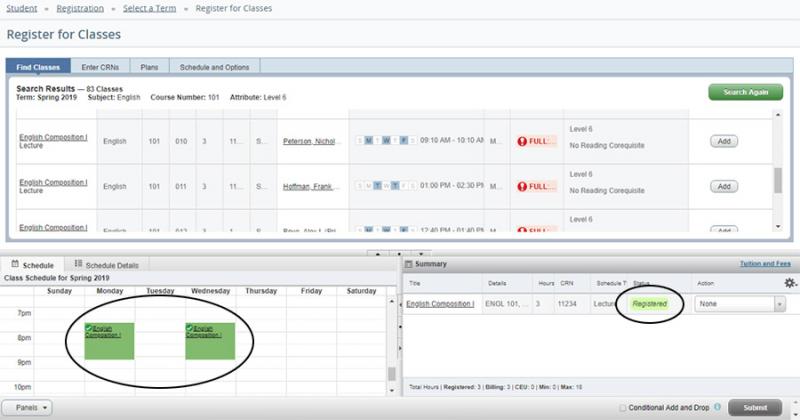
16. If you see Errors Preventing... under the Status and an Error message at the top, you are NOT registered for the course and must try again.
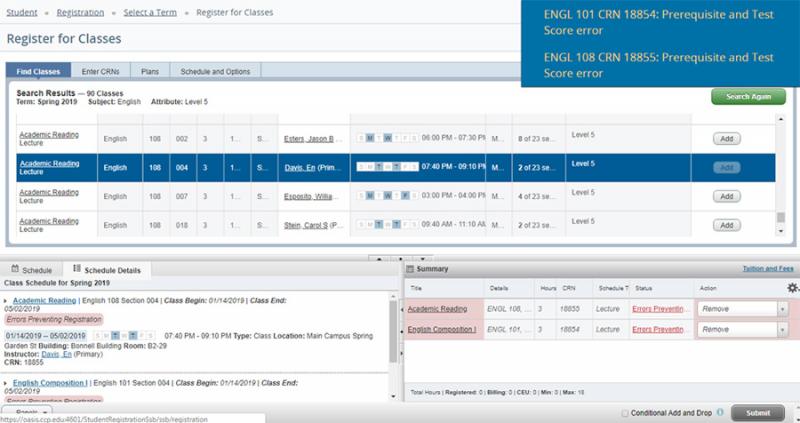
17. Once you have successfully registered, click on Schedule Details to review your schedule.
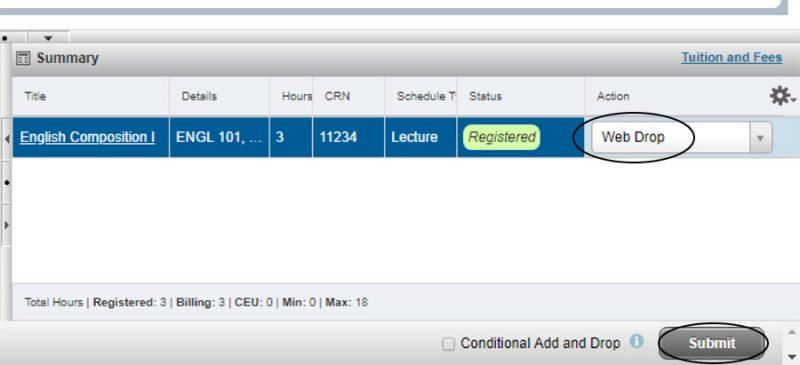
18. To drop a course, select Web Drop from the drop-down menu under Action and then click Submit.
19. To add another class, click Search Again and repeat the process until you are registered for all of the classes you want. Always check your Schedule Details after registering.

Dropping and Withdrawing from Classes
Students are personally responsible for dropping their classes before the first day of classes if they are not planning to attend. This applies to all students including those receiving financial aid. Failure to do so will result in tuition and applicable fees being charged to your student account for which you will be held financially responsible.
Financial aid cannot be applied to any class you are registered for that you did not attend, and adjustments may be made to aid received. If you do not attend classes you may be liable for all charges incurred, and your eligibility for future financial aid could be affected.
Please consult with an advisor or counselor before dropping or withdrawing from one or more classes after the term has begun.